
Yes. PICV commissioning is mainly about setting the design flow, verifying differential pressure, checking actuator operation, and confirming that the coil receives the required flow at different system conditions.


8
PICV Valve Commissioning — Step by Step
1. Check the design information
Before commissioning, collect:
- PICV valve size
- Manufacturer/model
- Design flow, e.g. 100 GPM
- Design differential pressure
- Coil pressure drop
- Minimum and maximum PICV operating ΔP
- Actuator type
- Control signal: 0–10 V, 2–10 V, 3-point, etc.
- Design chilled-water supply/return temperatures
Example:
| Parameter | Design |
|---|---|
| Coil design flow | 100 GPM |
| CHWS | 44°F |
| CHWR | 54°F |
| ΔT | 10°F |
| PICV | DN50 |
| Control | 0–10 V |
2. Verify installation
Before starting water flow, inspect the valve.
Check:
Flow direction
CHWS
 ↓
[ PICV ] → [ CHW COIL ] → CHWR
The arrow on the PICV body must match the actual water-flow direction.
Also check:
- Correct valve size
- Correct actuator
- Isolation valves fully open
- Strainer installed upstream
- Pipework flushed
- No air trapped in the system
- Pressure gauges/test points installed correctly
- Valve accessible for adjustment
3. Flush the chilled-water system
This is very important.
Before commissioning the PICV:
- Open flushing arrangements.
- Flush the pipework.
- Clean the strainer.
- Remove construction debris.
- Fill the system with clean water.
- Vent air from high points.
- Pressurize the system.
Do not commission a PICV with a dirty strainer or air in the system.
4. Start the chilled-water pump
Start the chilled-water pump.
For a variable-speed system:
Pump → PICV → Coil → ReturnInitially operate the pump at a suitable commissioning condition.
For initial balancing, it is often useful to have the system at a relatively stable/high enough differential pressure so that all PICVs are within their operating range.
5. Check differential pressure across PICV
This is one of the most important commissioning steps.
Connect a differential-pressure measuring instrument to the PICV test points.
        ΔP measurement
       ↓             ↓
CHWS ──●── [ PICV ] ──●── Coil
       P1              P2

       ΔP = P1 − P2
Measure:
ΔP across the PICV
Compare the measured ΔP with the manufacturer’s specified operating range.
For example:
Required PICV operating range = 5–60 kPa
Measured:
ΔP = 25 kPa
Therefore, the valve has sufficient differential pressure to operate correctly.
Important: The exact minimum ΔP is manufacturer/model specific. Do not use a generic value for commissioning.
6. Set the design flow
Now set the PICV to the required design flow.
Suppose:
Design flow = 100 GPM
Depending on the manufacturer, you may set the flow using:
- Flow-setting scale
- Preset ring
- Adjustment knob
- Digital commissioning tool
- Manufacturer’s flow chart
Example:
Design flow = 100 GPM

PICV setting
     ↓
   [ 100 ]
     ↓
Maximum flow = 100 GPM
Set the valve according to the manufacturer’s commissioning table.
Do not assume that “50% valve opening = 50% flow.” PICV settings are manufacturer-specific.
7. Measure actual flow
After setting the valve, measure the actual flow using the appropriate commissioning method.
Possible methods include:
- Manufacturer’s differential-pressure/flow measurement
- PICV commissioning meter
- Ultrasonic flow meter
- Dedicated valve measurement instrument
Suppose:
Design = 100 GPM
Measured:
Actual = 98 GPM
Error: %Error=10098−100×100 =−2%
So the measured flow is approximately 2% below design.
Whether that is acceptable depends on the project’s commissioning specification/tolerance.
8. Adjust the PICV
If actual flow is outside the project tolerance:
Design Flow = 100 GPM
Actual Flow = 90 GPM

          ↓
Check ΔP
          ↓
Check valve setting
          ↓
Adjust PICV
          ↓
Re-measure flow
Do not immediately change the valve setting without checking ΔP first.
If ΔP is below the valve’s required minimum, changing the setting may not solve the problem.
Check:
- Pump differential pressure
- Strainer blockage
- Isolation valve position
- Air in coil
- Pipe blockage
- Incorrect valve installation
- Incorrect PICV selection
9. Test actuator operation
Now check the control actuator.
For a typical 0–10 V actuator:
BMS / Controller
       │
       │ 0–10 V
       ↓
   Actuator
       ↓
     PICV
       ↓
     Coil
Command:
| Control Signal | Expected Valve Position |
|---|---|
| 0 V | Minimum/closed position* |
| 2 V | Low opening |
| 5 V | Intermediate |
| 8 V | High opening |
| 10 V | Maximum/open position |
*Actual relationship depends on actuator configuration.
Confirm that the actuator moves smoothly and reaches its end positions.
10. Test minimum and maximum flow
This is an important PICV commissioning test.
Minimum cooling demand
Command the actuator toward minimum flow.
Check:
- Valve responds correctly
- Coil flow decreases
- No abnormal noise
- Actuator feedback is correct
Maximum cooling demand
Command the actuator to maximum.
Check:
- PICV reaches the preset maximum flow
- Flow does not exceed the selected maximum
- Actuator reaches required position
For example:
PICV maximum setting = 100 GPM

Actuator 100%
       ↓
Actual flow ≈ 100 GPM
       ↓
NOT 130 GPM
This is one of the major advantages of a properly selected PICV.
11. Check different system pressure conditions
This is where PICV commissioning becomes particularly valuable.
Change the system operating condition—for example, allow other AHUs/FCUs to modulate.
The system ΔP may change:
Condition A
ΔP = 20 kPa
Flow = 100 GPM

Condition B
ΔP = 35 kPa
Flow ≈ 100 GPM

Condition C
ΔP = 50 kPa
Flow ≈ 100 GPM
As long as the PICV remains within its specified operating range, the flow should remain controlled around the set maximum.
This demonstrates the pressure-independent characteristic.
12. Check coil ΔT
After stable operation, measure:
CHWS temperature
and
CHWR temperature
Example:
CHWS = 44°F
CHWR = 54°F

ΔT = 54 − 44
   = 10°F
If the design ΔT is 10°F, this indicates the coil is performing close to the intended design condition.
However, ΔT should not be used alone to prove flow because coil load and entering-air conditions also affect ΔT.
13. Check BMS operation
If connected to BMS, verify:
- Valve command
- Valve feedback
- Room temperature
- Supply-air temperature
- CHWS temperature
- CHWR temperature
- Flow, if monitored
- Differential pressure, if monitored
- Alarm status
Example:
Room temperature
      ↓
Temperature sensor
      ↓
BMS controller
      ↓
0–10 V command
      ↓
PICV actuator
      ↓
PICV
      ↓
CHW flow
      ↓
Cooling coil
14. Record commissioning data
Create a commissioning sheet for every PICV.
Example:
| Item | Reading |
|---|---|
| AHU/FCU | AHU-01 |
| PICV Size | DN50 |
| Design Flow | 100 GPM |
| PICV Setting | 100 GPM |
| Measured Flow | 98 GPM |
| PICV ΔP | 25 kPa |
| CHWS | 44°F |
| CHWR | 54°F |
| ΔT | 10°F |
| Actuator | 0–10 V |
| Maximum Command | 10 V |
| Minimum Command | 0 V |
| Status | PASS |
15. Final commissioning sequence
A good field sequence is:
Design Data → Installation Check → Flushing → Air Removal → Pump Start → ΔP Check → PICV Setting → Flow Measurement → Adjustment → Actuator Test → System ΔP Test → Coil ΔT Check → BMS Test → Record Data
The most important rule
Never set a PICV based only on the valve position or actuator signal.
One Reply to “PICV valve comissioning Process Step by step.”
Leave a Reply
Related Posts
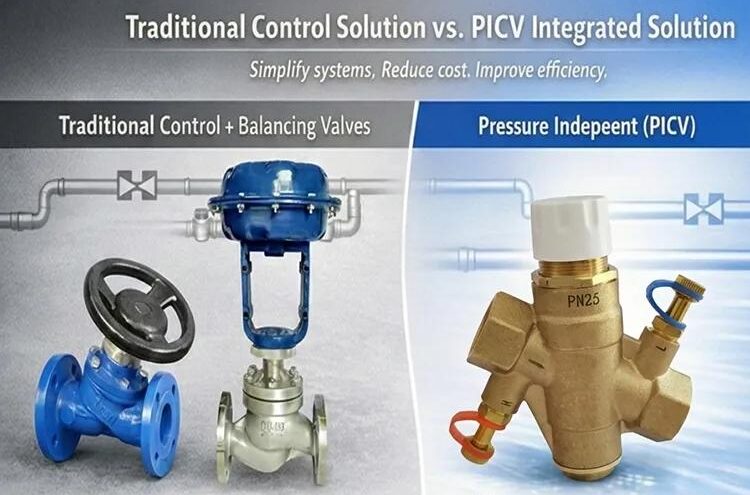
Why We Use PICV Instead of a Conventional 2-Way Motorized Valve in HVAC Systems
In modern chilled-water HVAC systems, PICV (Pressure Independent Control Valve)…

Thanks for sharing your knowledge